Last updated on January 8, 2023
Did you know that every post, message, photo, and video you’ve shared on Facebook since the day you’ve joined has been permanently archived?
Facebook is the second most visited website in the world and it has built its empire on personal information from millions of people like you.
That’s the price of a “free” service like Facebook, and you can expect the same from any other social network you use, including some of your favourite websites that require you to register and provide personal information.
The good news is that all the personal information that Facebook has ever collected on you is available for a free download.
Why Should I Download My Facebook Data?
There’s a few great reasons why you should download your Facebook data:
- It’s eye opening to know how much data has been collected on you
- It’s fun to reminisce. Do you remember the first post you ever made on Facebook? You soon will (and you’ll probably laugh)
- It’s a great way to quickly back up all your photos and videos in one fell swoop
Without further ado, let’s get started.
Step 1: Access Your Facebook Settings
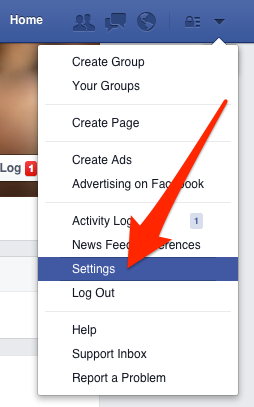
First, log in to your Facebook account, click the small down arrow in the top right area of your screen, and then click Settings.
Step 2: Click the Download Link
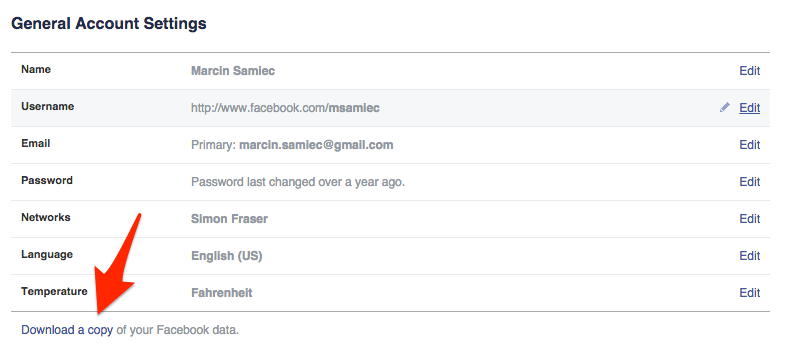
Next, click “Download a copy of your Facebook data”.
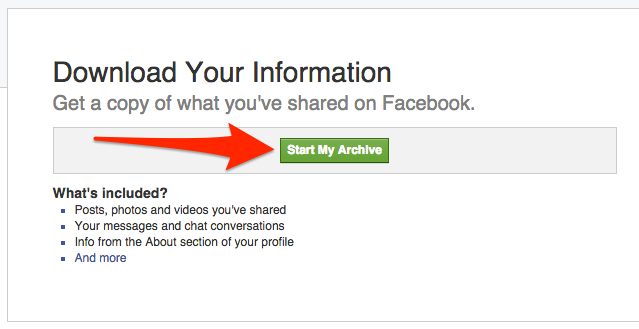
Step 3: Start Your Archive
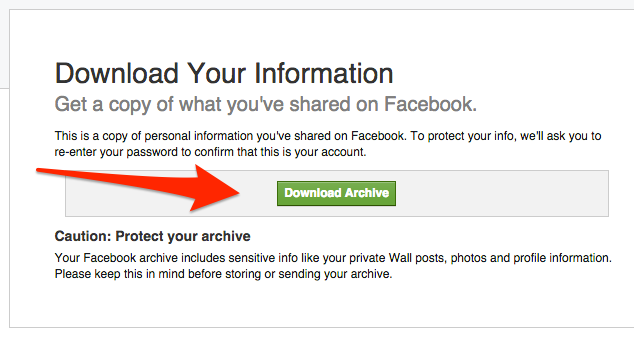
Next, click “Start my Archive”.
At this point you’ll be prompted to enter your password to verify your identity. Facebook will send you an email with a link to your data once it’s ready, but be prepared to wait anywhere from five to fifteen minutes for Facebook to prepare the data.
Step 4: Download Your Archive

Click the link in the email provided, and at last you’ll be able to download all your data.
Depending on how much data you have on Facebook, your download can last a few seconds to a few minutes. My download was approximately 100 megabytes and took two minutes to download.
Step 5: Open the Index file
Open the archived file and extract the contents somewhere on to your computer. Once extracted, open the index.htm file.

This should load up your internet browser and show you your own personal webpage with links to all your personal data.
Step 6: Get Ready to Explore
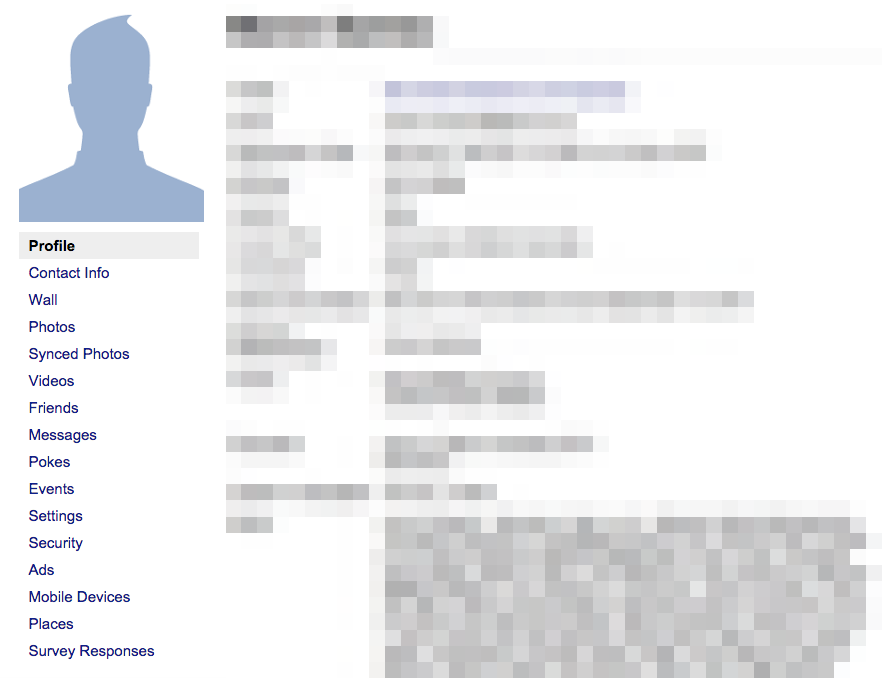
This is where the fun really begins. Start exploring some of the links provided on the left side of the page to access different areas, including your:
- Profile
- Contact Info
- Wall
- Synced Photos
- Videos
- Friends
- Messages
- Pokes
- Events
- Settings
- Security
- Ads
- Mobile Devices
- Places
- Survey Responses
Did you find anything that surprised you? If you enjoyed this article, share it with your friends and be sure to share your experience in the comments below.

Be First to Comment